- Products
- Solutions
- Developers
- Support
- About


To get started, you will need to configure your Shopify instance to have a webhook. To do this, you will need to log into your Shopify account. Head down to the Stores, Programs, and Resources and select your store.
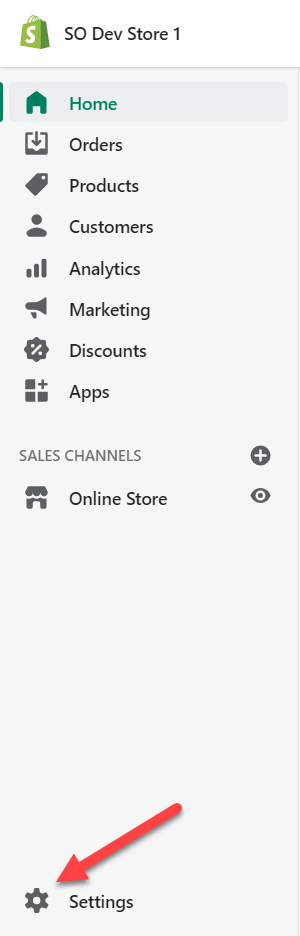
From there, you will be redirected to your store’s admin page. While here, you will want to click the Settings icon. This should be all the way on the bottom left portion of the sidebar.
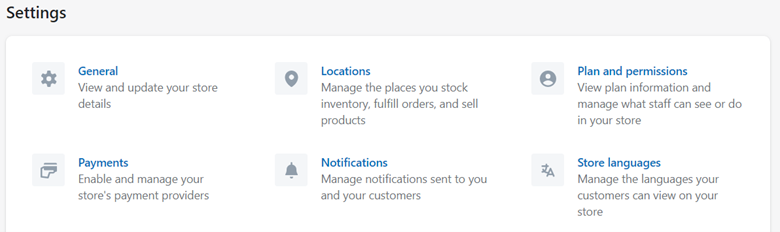
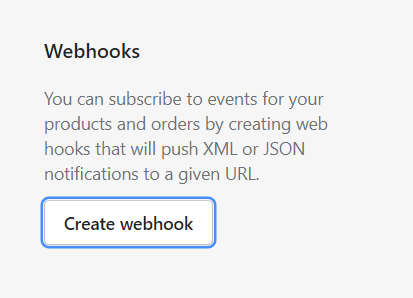
Then you will select Notifications and scroll all the way down until you come to the Webhooks section. To create a webhook, go ahead and select Create Webhook.
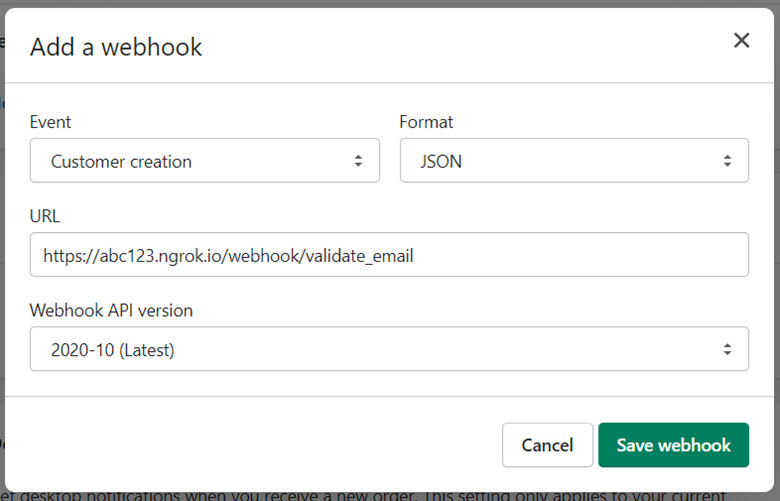
On the resulting page, you can define the event that will call the webhook. In this case, we’ll be using the Customer Creation event. We’ll select JSON as the return type, and for the URL we’ll put a placeholder URL of https://abc123.ngrok.io/webhook/validate_email. Shopify requires webhooks to be sent to HTTPS endpoints, so testing directly against a localhost won’t be an option here. This is why a tunneling service like ngrok is used, as it allows users to expose a localhost port to a publicly accessible HTTPS endpoint. This allows us to do some quick testing without having to go through the process of setting up an actual server that would receive requests through a static HTTPS endpoint.
The base ngrok URL will change once we launch the tunneling service to connect to our localhost, but we’ll create an application with the /webhook/validate_email endpoint so that can remain as-is.
Select Save Webhook and voilà! You have successfully created a webhook through Shopify. Now that we have this, we’ll need to create a private app in Shopify so that we can update the customer data and spin up an application in Ruby that will accept the webhook requests.
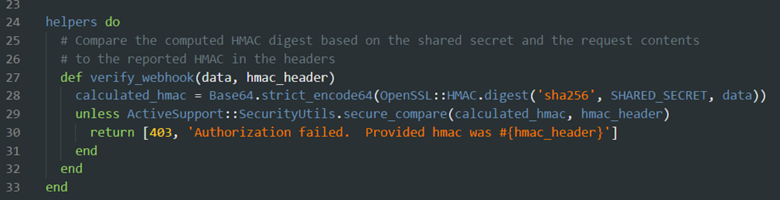
After you create a webhook, a note should appear below where the webhook is listed that will indicate the HMAC header that all your webhook requests will be signed with. Be sure to save this, as you will need it to ensure that the requests coming to your application are signed with the same HMAC header.
In addition to this, we’ll need to create an app in Shopify so we can update the customer information with the validation info from our Email Validation 3 service. We’ll also need to create a private app to provide the Shopify API with an API Key and API secret that will allow us to update our Shopify instance. Our example will just be a private application, but if you are intending to create a public application, we recommend implementing Shopify’s best practices around authenticating a public app with OAuth.
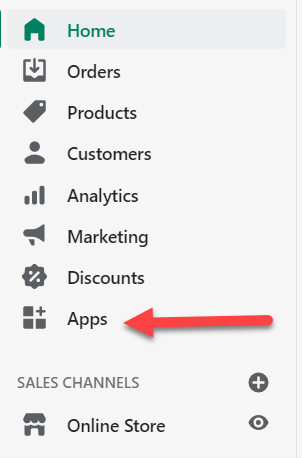
To add an app, go to your Shopify admin page and select apps:
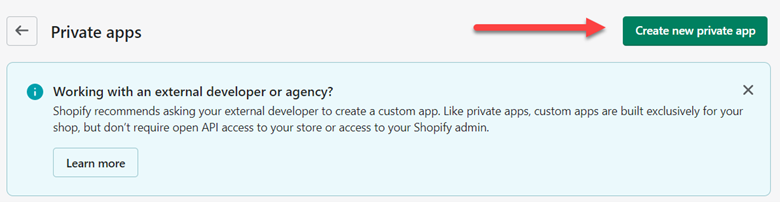
Then select “Manage Private Apps” at the bottom of the Page. On the resulting page, select “Create New Private App”. Note: You may need to enable using private apps to create a new private app.
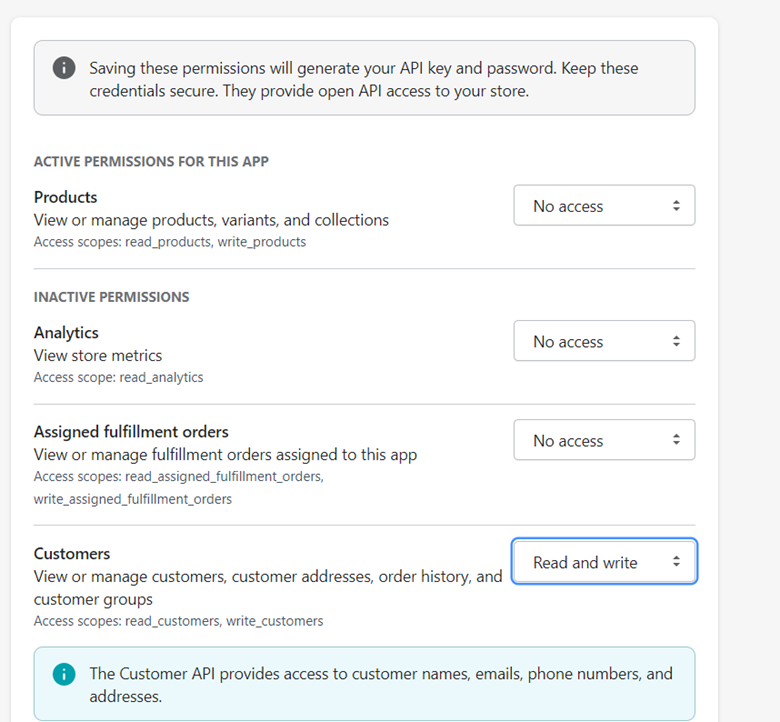
After selecting Create New Private App, you will be directed to a page that allow you specify a name and developer email for the new app along with the objects to which your app will have access. For each of these objects, you can select No Access, Read Access, or Read and Write Access. Since we want to update customer information, we’ll set the Customers object to Read and Write Access and set the other objects to No Access.
Click Save at the bottom of the page and you should now be able to select the app you just created and subsequently view the API key and password that were generated. Be sure to keep these handy along with your store name, as we’ll use those values when we use the Shopify class library to update our customer information.
As mentioned previously, we’ll be using Ruby in our example to create an endpoint that will listen for the webhook. To start, we’ll create a file called app.rb along with a gem file that will detail all the dependencies we’ll be using for our application.
The gem file should contain the following dependencies:
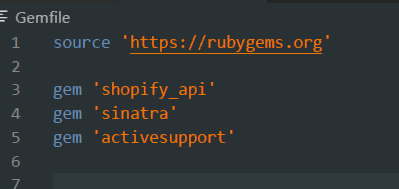
As stated previously, we’ll use the Shopify gem to update our customer information, the Sinatra gem to launch a quick webservice and the activesupport gem to calculate and verify the HMAC header that gets sent along with the webhook.
At the top of the app.rb file we’ve created we’ll add the following require statements and global variables:
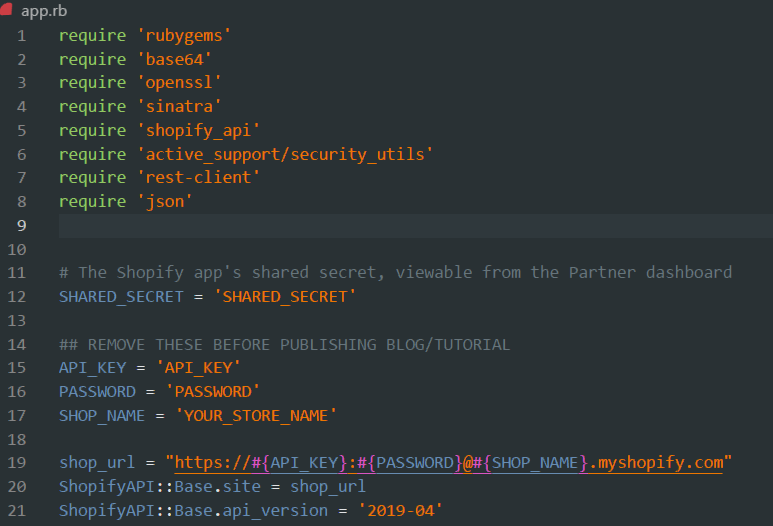
The require statements will tell our Ruby app which gems we will need to run this program and the global variables that are declared will allow the Shopify gem to properly update the customer information. Before launching this app, be sure to fill in the SHARED_SECRET, API_KEY, PASSWORD, and SHOP_NAME values with the appropriate values for your store and Shopify app that we just created.
Next, we’ll create a helper method that will ensure the calculated HMAC value from the request is equal to the value present in the header of the request that will be sent to the endpoint that will be listening for the webhook request.
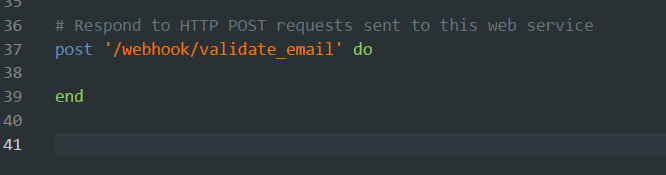
As we defined earlier, the endpoint to which the webhook will make a request will end in “/webhook/validate_email”. To create this endpoint, all we need to do is create the following code:
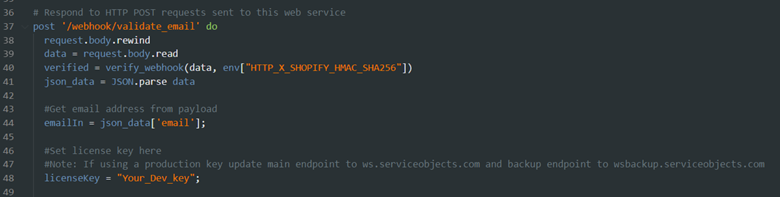
Now we have an endpoint that will listen for POST requests! Let’s go about adding some processing in the method. For starters, we will rewind the post body and send it to the helper method we created that will calculate the HMAC of the post body and ensure that it matches up to the header sent in the request. We’ll also parse out the request body into json format and pull out the email that we’ll use to send to the DOTS Email Validation 3 service. Additionally, we’ll instantiate the license key. Put your own Service Objects license key here!
Now that we have set up, we can setup or calls to the EV3 web service along with proper failover configuration.
Since we are demoing this integration, the endpoint in our screenshot will be hitting the trial.serviceobjects.com endpoint. If a production key is being used, then the primary endpoint should be sws.serviceobjects.com and the backup endpoint should be swsbackup.serviceobjects.com.
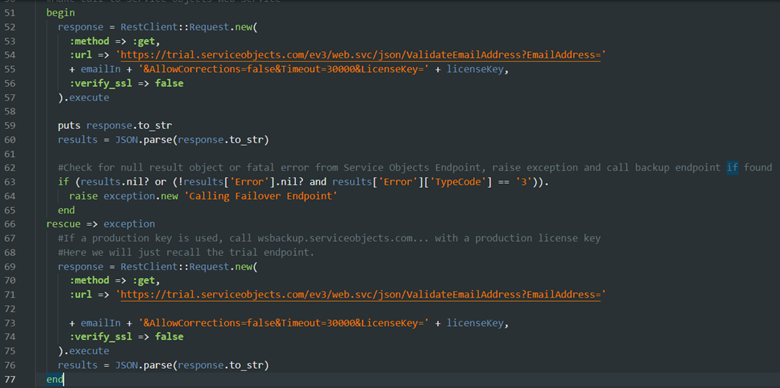
After we call the primary endpoint, we are going to do a check to see if the backup endpoint should be called. This involves wrapping the primary call in a try/catch block (or as shown in Ruby begin/rescue) in the event that there is an exception thrown while calling the primary endpoint. After the call is made, we’ll check the to see if the response was null or if there was a fatal error present. If either of these conditions are met, we’ll raise an exception and then proceed to call the backup endpoint. This setup will minimize any service interruptions in the event that the primary Service Objects endpoint is unreachable. Feel free to read more about failover configuration here.
Since we’ve successfully setup the call to the EV3 service, we’ll need to process the response and provide some custom logic that will update the Notes field in the customer object. First, we will pull down the Customer object by using the ID the webhook sent to look up against the Shopify API. Next, the code will check if an error is present in the response; if it was, then we will update the notes field indicating so. If there is no error present, we can assume that the service returned a successful response.
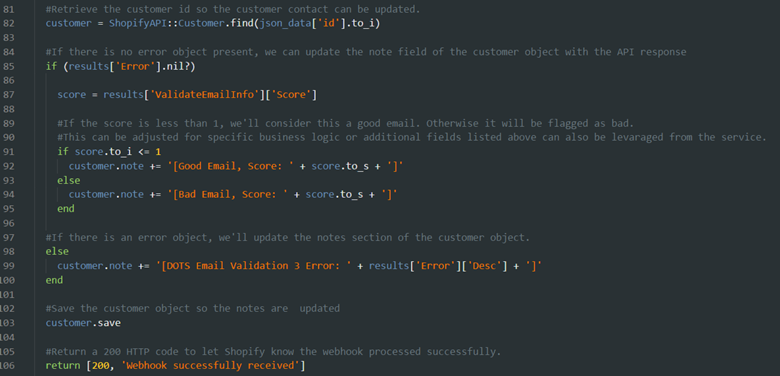
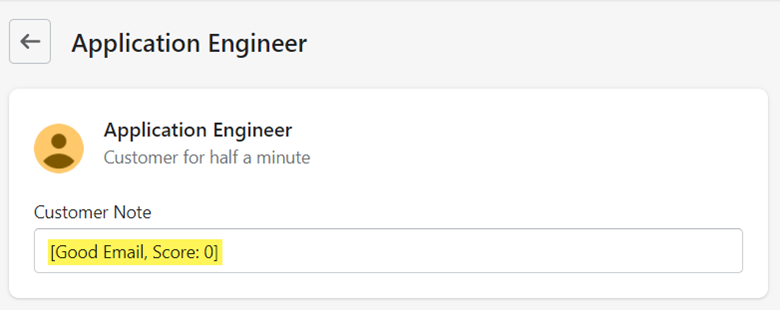
For this tutorial, we are considering an email as good and valid if the score is less than equal to 1. If a score is greater than 1, then we will call it a bad email address. Please note, this is just an example and your logic may vary! This logic will reject emails with a score of 2 that are considered “unknowns”.
This would also be a great spot to make use of the some of the other returns from our service. If you want to access those fields you would do so as noted below:
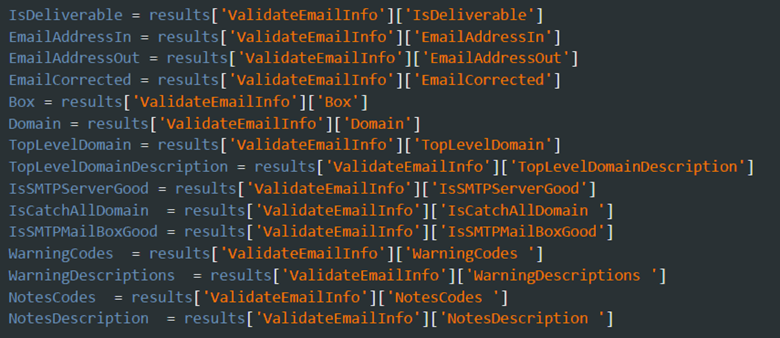
Several of these other fields can be leveraged, to help narrow down your business logic and make sure you are using your Service Objects EV3 validation service to its fullest potential. For instance, if you wanted to make use of the Warning Codes our service returns to ensure that a user didn’t use a disposable email, you could check the WarningCodes field to see if it contains code 13, which corresponds to the DisposableEmail code in the EV3 service. Or if you wanted to know which of your clients used a business email, you could check the NotesCodes field for code 4, which would indicate a BusinessAddress was used. Take some time to get familiar with our services to understand how to best leverage the results.
Additionally, if you have custom fields that you want to write to, this would be the place to do it as well. If you aren’t sure what fields to make use of, please let us know! We’re always happy to make recommendations based on your specific use case.
Now that the Note section has been updated, all we need to do is save the customer object and then return a successful response. This is crucial, or else Shopify will eventually deactivate our webhook if it doesn’t respond with a 200 code.
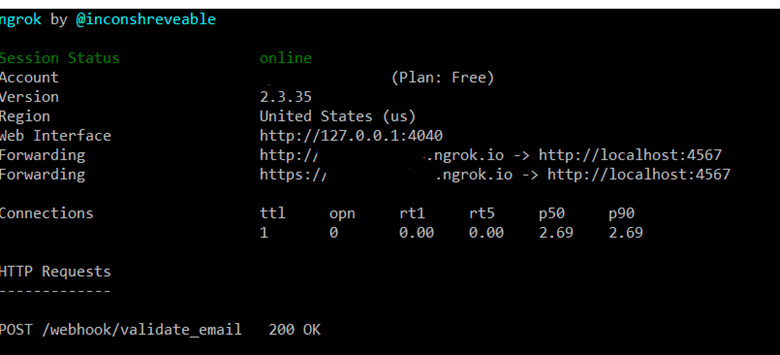
Now we can launch our app and test out our webhook. You may have to run a bundle install on your Ruby app to properly install the appropriate gems. Be sure to launch ngrok on port 4567 and update the endpoint to which Shopify will send the webhook information. You can launch ngrok by typing “ngrok http 4567” into your command prompt.
To launch your Ruby app, simply type “ruby app.rb” into the command line where your application lives. If you haven’t run into any syntax issues, then your webhook should be up and running and ready to test out.
To do this, we’ll head back to the customers section of the store page and add a new customer with the following details:
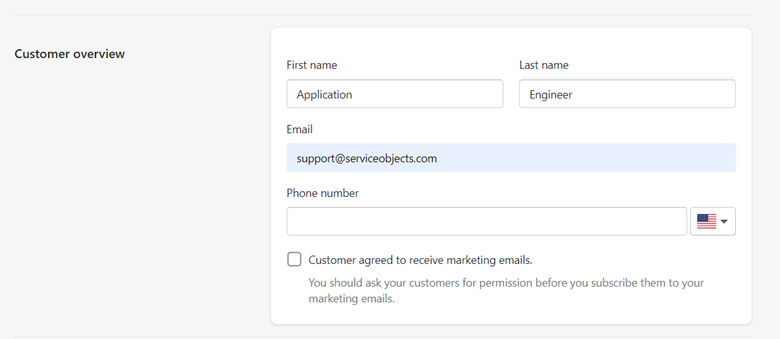
Select Save and simply wait for the webhook to fire! If all went as planned, you should be able to see the updated notes on the customer profile:
If there was an issue in the process, then your ngrok terminal along with the prompt where the Ruby app was run would help provide clues as to what the issue may be. To download the code we created in this example, click here.
If any questions come up about this tutorial or anything else integration-related, please reach out! We’re always happy to help our clients get the most out of their Service Objects’ validation products.


