- Products
- Solutions
- Developers
- Support
- About
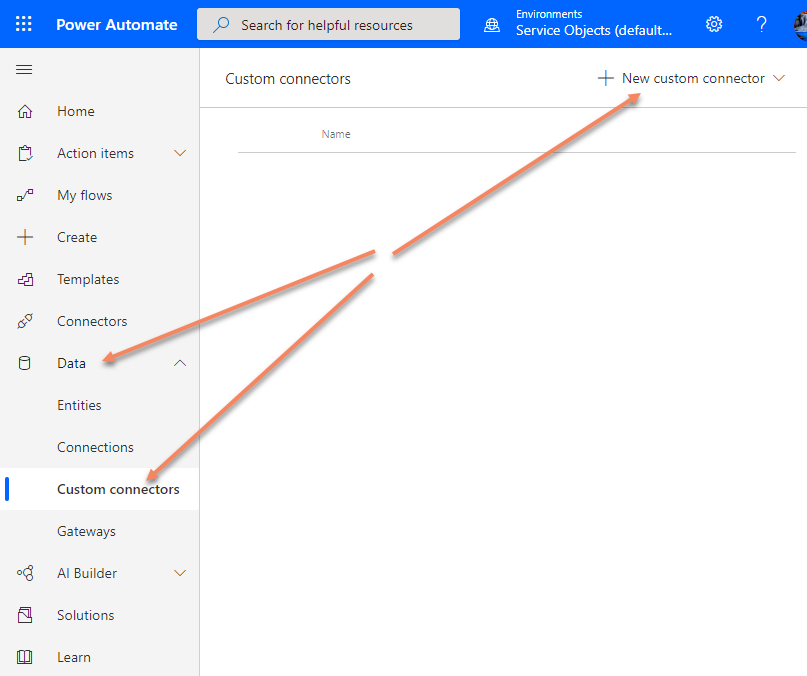
First, after logging into Power Automate, on the left pane you’ll want to expand the Data section and click on Custom connectors. Once you’ve done that, you can click on New custom connector.
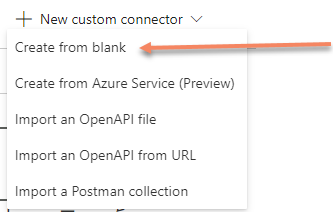
At this point, you’ll see that there ae several ways to create the connector, and some ways are more automated then others. I am going to show you how to create the connector from a blank, so click on Create from blank.
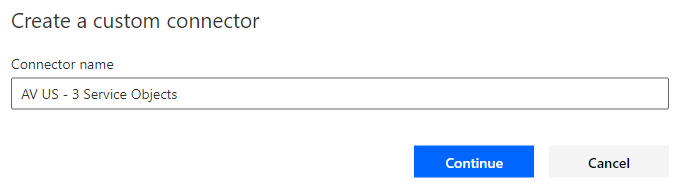
Next, name your connector. I’m using our DOTS Address Validation US – 3 product so I will name it accordingly.
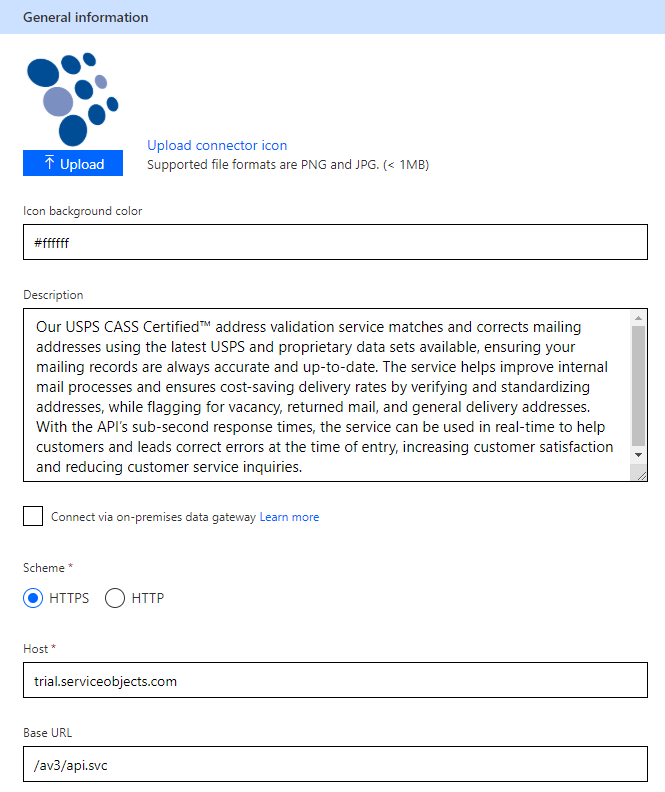
The next screen is the General section, where you can upload a logo, add a description and enter the URL endpoint of the validation tool. The logo and description are easy enough, but to get the values you will need for the Host field and the Base URL field and, well, that’s easy too. In our developer guides, you can find all this information and more.
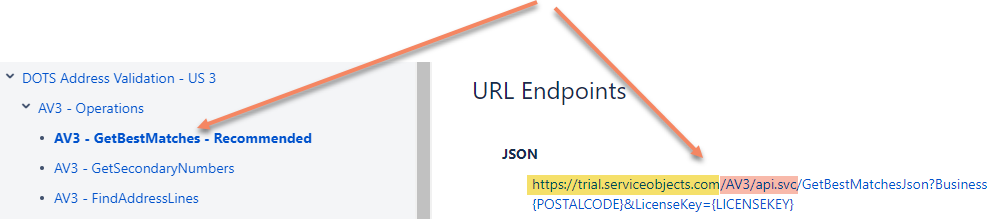
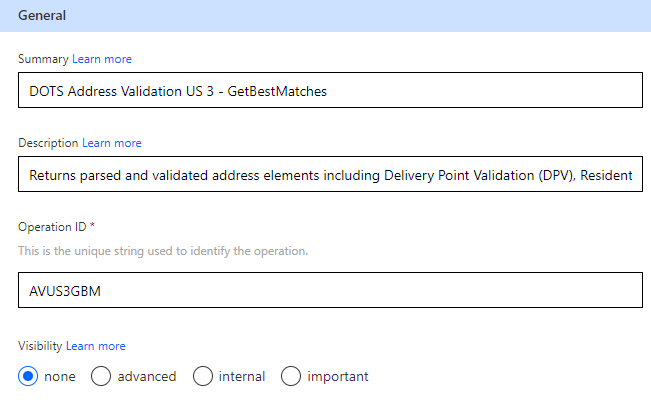
This demo will take you through creating a connector for our DOTS Address Validation US product, but the process will be near identical for our other tools. The Address Validation US product has several operations, but we are going to use the recommended operation GetBestMatches. It returns parsed and validated address elements including Delivery Point Validation (DPV), Residential Delivery Indicator (RDI), and Suite data. GetBestMatches will attempt to validate the input address against a CASS-approved engine and make corrections where possible.
Now, back to the field values to enter. For the Host, it will be the portion highlighted in yellow for the JSON endpoint and can be found here. Make note that this says “trial.” If you purchase a production license key from us after you integrated with the trial key you’ll need to change “trial” to “ws.” Everything else here stays the same. The Base URL is the portion in the image highlighted in pink.
Your page should look similar to the following screenshot.
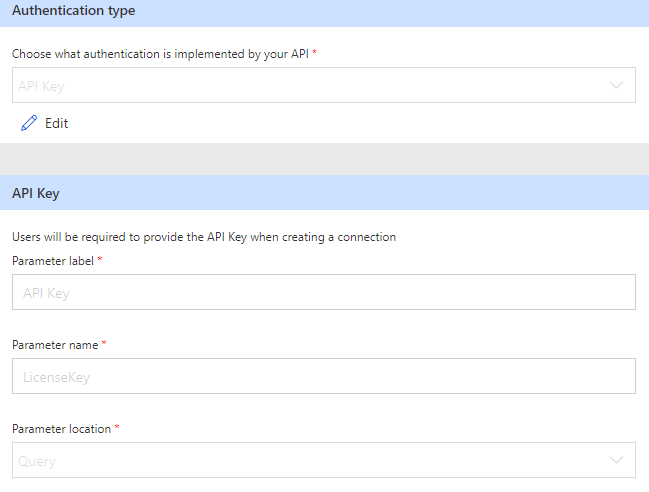
The next section to fill out is the Security section. Here you’ll be adding details about the authentication type and the license key (trial or production). For the authentication type you will need to select API Key and then enter additional details in the section below. I used API Key as the Parameter label, and you have flexibility here to name it what you want, but the Parameter name must be LicenseKey. Select Query for Parameter location. Your screen should look similar to this screenshot. These values are greyed out because they were saved from a previous demo.
Now on to the third section, the Definition section. In the General part we’re going to add additional details describing the connector we are creating. After clicking New action in the Actions section on the left and filling out the details, your screen should look similar to the one shown.
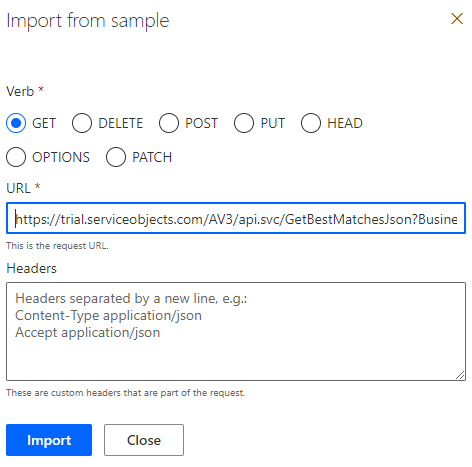
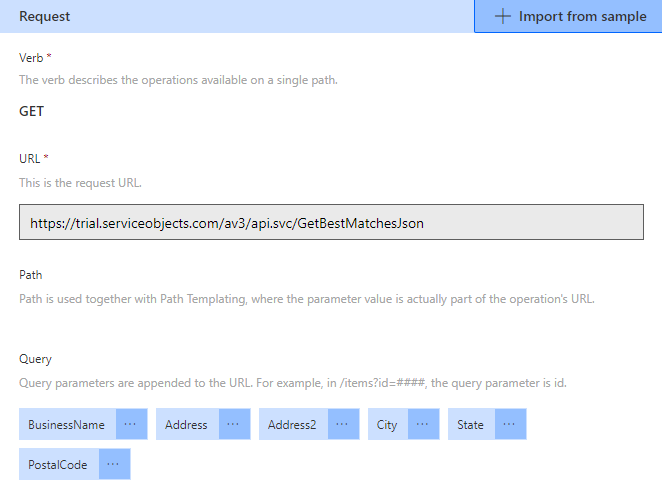
The Request and Response sections do the input and output mappings to the Address Validation tool. In the Request section, click on Import from sample, which will pop open the Import from sample UI. In the Verb selection area click on GET. After that you’ll need to enter the URL. For that we go back to the dev guide and pull out the highlighted section and populate the URL field. Make sure not to include the LicenseKey portion of the URL, we have accounted for the license key earlier.

You can leave the headers section unchanged and click import. The Import from sample section should look like this.
And your Request section should now look like this, with all the needed query string parameters broken out into to Query area. If you are using a different Service Objects data validation tool, you’ll see a different list of parameters.
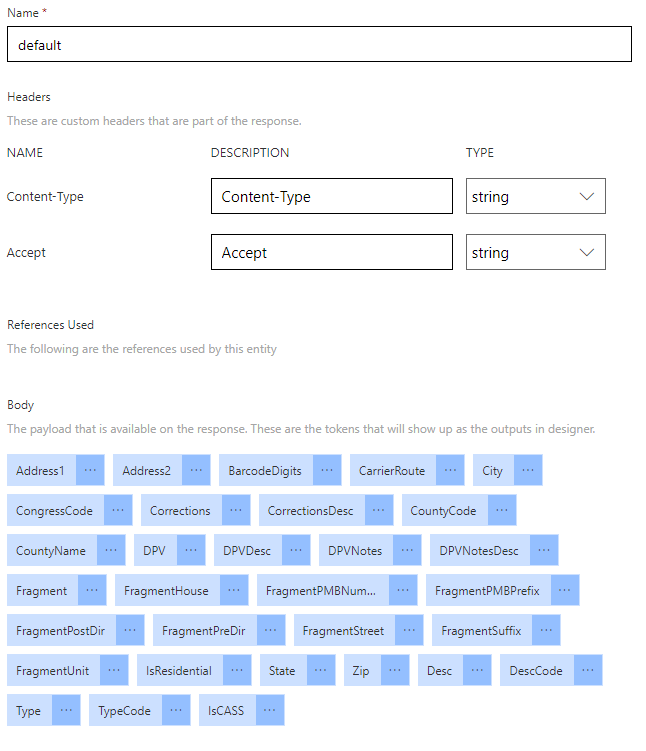
Setting up the response is not much different. In the Response section, click on the grey default button, and it will take you to the UI that will assist in defining the outputs. This is easy as well, because we can do this by importing a sample from the actual output. This starts by clicking Import from sample and adding the following to the headers field:
Content-Type application/json
Accept application/json
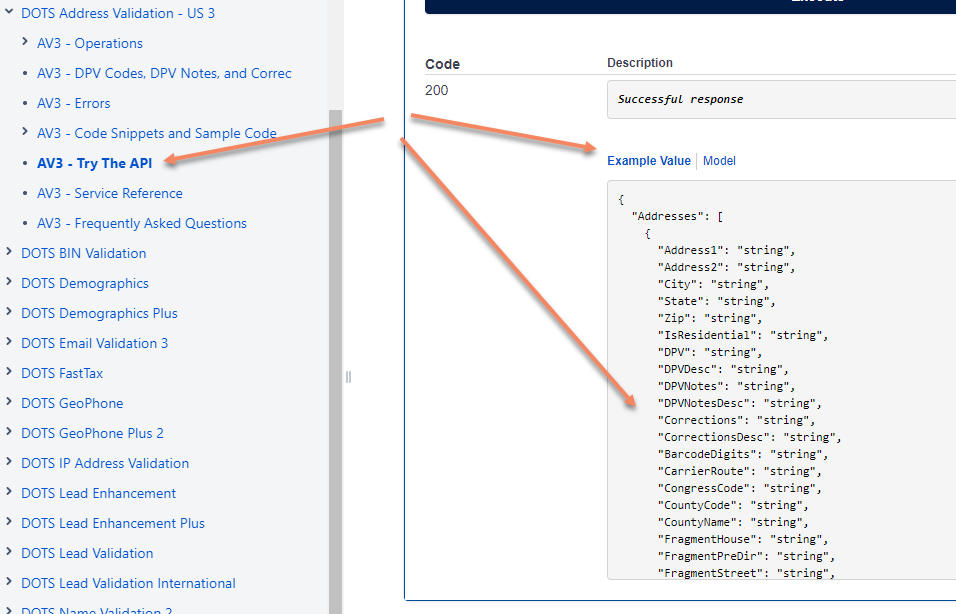
For the second field, Body, we will need to grab from the developer guide in the Try the API section. All of our data validation tools with have a Try the API section. On that page, scroll down to the Example Value. Copy that value and paste it in the Body field back over in the Custom Connector UI.
The result after clicking Import should be as shown. Again, depending on the tool, your list could be different.
At this point you are left with saving and testing in the last section, and that’s it. This may seem like a lot of steps, but what we presented here can be accomplished in about 10 minutes time.
The next blog about this topic will take you through how to put together a couple of common flows that will allow you to inject data validation into your flow, to keep your data as accurate and up to date as possible – stay tuned.