so_logo.png

Adding an Address Autocomplete Service to a Marketo Web Form

September 2021
marketo
Print Friendly, PDF & Email
Introduction

In this tutorial, we will cover how to get DOTS Global Address Complete, an address autocomplete service, up and running in a Marketo web form. This will allow the Global Address Complete service to make suggestions on a user-entered address within a Marketo form. This will help prevent form abandonment while improving accuracy and submission rates into your Marketo pipeline. The best thing is, this is a simple and quick integration to make, so you can have our address autocomplete service up and running in no time!

To get started, you will need three things:

  1. Basic familiarity with JavaScript.
  2. Access to creating a Marketo Form and Landing Page
  3. A DOTS Global Address Complete License key. Sign up for a free trial here!

If you want to download a copy of this guide, click here!

What is Marketo and why does it matter?

Marketo is a marketing automation software that provides businesses with tools to get their leads and prospective customers engaged in marketing funnels. Most notably, Marketo offers the ability to easily and quickly create forms for users to enter contact data and then send into the Marketo ecosystem to let businesses quickly and effectively make decisions on how to best engage users. Since user forms are involved, this makes Marketo forms a perfect pairing with Global Address Complete.

Table of Contents:

1: Create Your Marketo Form

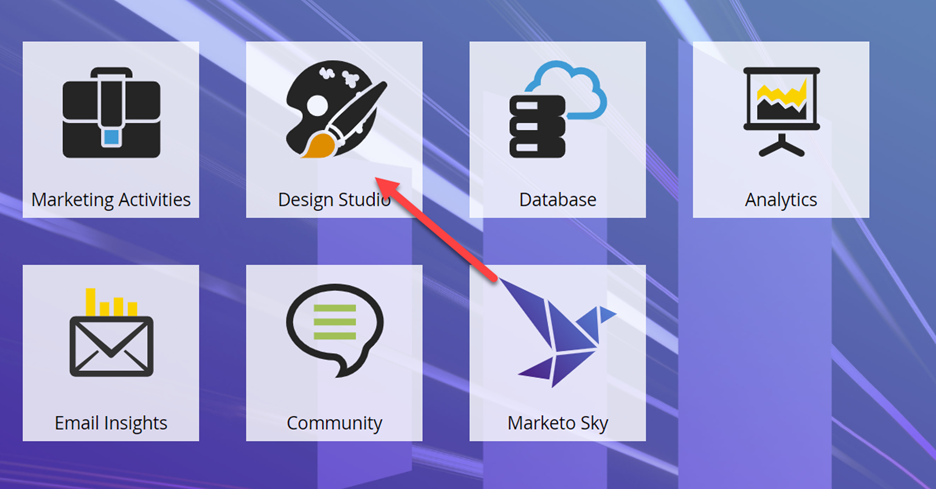
For starters, we will need to create the form that will have the address information fields that the Global Address Complete service will automatically fill in. To do this, head to the design studio of your Marketo instance:

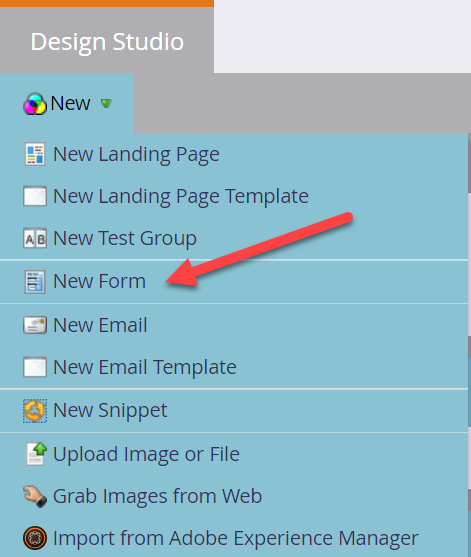
On the resulting page, select “New” and then “Form”

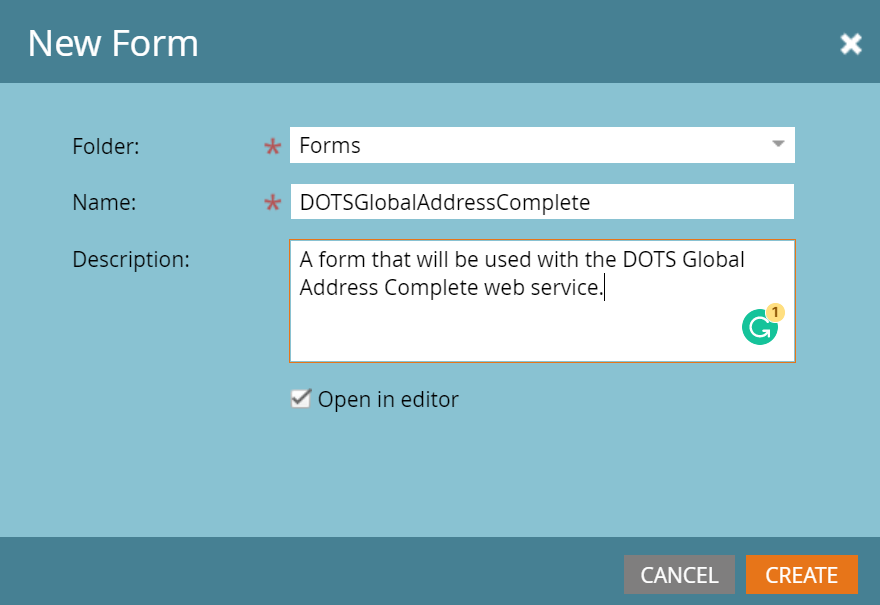
On the new form page, select the Folder in which you would like to save this form and give it an appropriate name. We’ll use the below details.

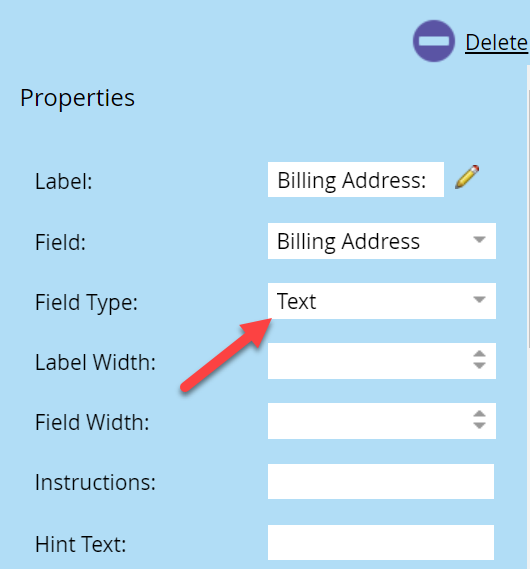
Now we will need to add the different input fields that the Global Address Complete service will use to search for address suggestions and automatically fill them in once a user selects an address. In our example, we’re just going to use the default billing address fields but this would be a great place to use some custom Marketo fields you have created in your instance. Using the “+” symbol, add the fields you want to the form. We will make all our fields have the FieldType of Text as shown below.

Once all your fields are in the form, select Finish to create the form.

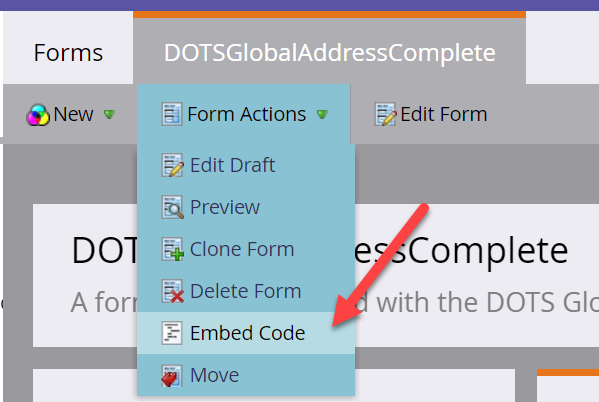
After this, select “Approve and Close”. Before we create the landing page, head to the “Form Actions” heading and select “Embed Code”

Make sure to select the “Lightbox” option from the Code Type drop-down menu and then copy the code on the resulting pop-up and save it. We will use this in the next step to put the form on our landing page.

2: Create the Landing Page

Next, select New, then “Landing Page” and then fill in the appropriate details for the landing page. We will add the following in our example:

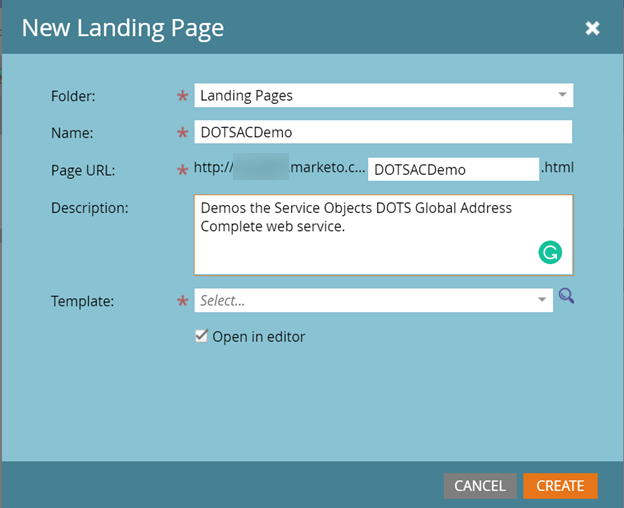
Select “Create” to create your landing page! Our landing page has been created; now we will add the form to it that was created in the previous step.

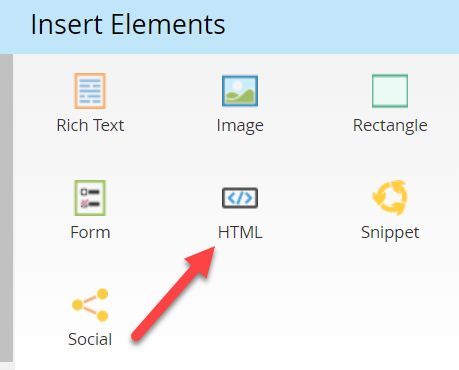
On the right-hand pane, drag and drop the “HTML” element into the landing page.

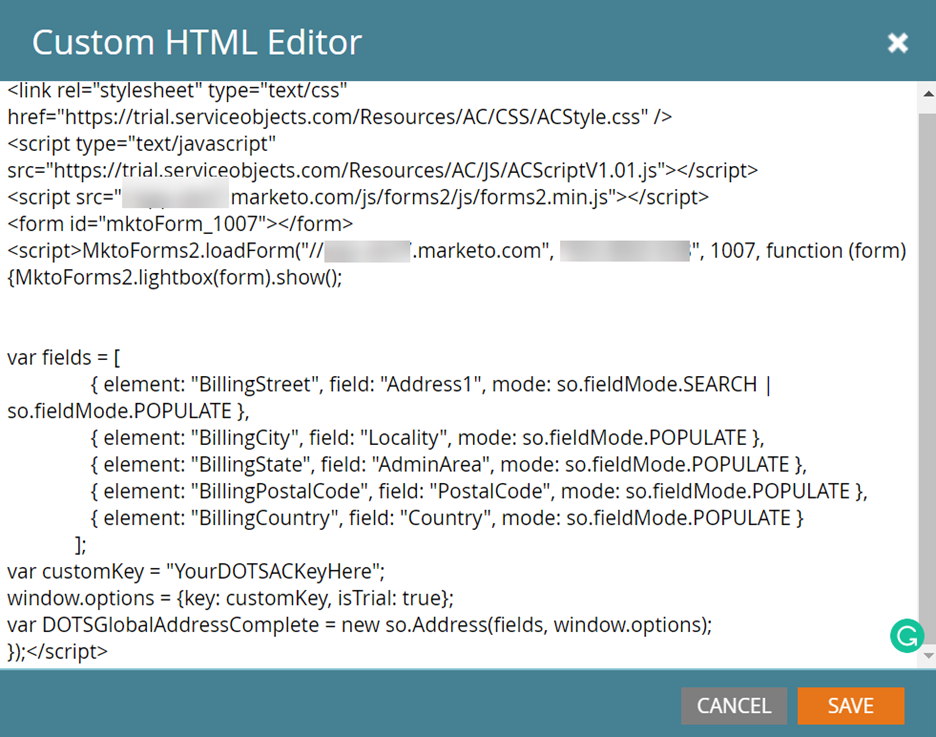
In the custom HTML editor, paste in the code we copied from the previous step. Your HTML page should look something like the following:

3: Setting up the Call to Global Address Complete

We’re almost there! The next step is to add in the call to the Global Address Complete service inside the HTML editor.

First, put the following two links at the top of the HTML Editor.

These two links reference the CSS that will style the drop-down list of suggestions and the JavaScript that will ultimately do all the heavy lifting in making the web service call and filling in the input fields.

Next inside the loadForm function of the form code we just copied, add the following code:

var fields = [
{ element: "BillingStreet", field: "Address1", mode: so.fieldMode.SEARCH | so.fieldMode.POPULATE },
{ element: "BillingCity", field: "Locality", mode: so.fieldMode.POPULATE },
{ element: "BillingState", field: "AdminArea", mode: so.fieldMode.POPULATE },
{ element: "BillingPostalCode", field: "PostalCode", mode: so.fieldMode.POPULATE },
{ element: "BillingCountry", field: "Country", mode: so.fieldMode.POPULATE }
];
var customKey = "YourDOTSACKeyHere";
window.options = {key: customKey, isTrial: true};
var DOTSGlobalAddressComplete = new so.Address(fields, window.options);

A couple of notes about this bit of code:

  • The “element” portion of the field inputs correspond to the input IDs on the form. For this example, we are using the Billing address fields. If you are using your own custom fields, you’ll need to put in the name of the fields here.
  • For the BillingStreet input, we specify the mode of “sofieldMode.SEARCH | so.fieldMode.POPULATE” as this will tell the Global Address Complete service to use the text the user enters in the BillingStreet input field to lookup potential address matches.
  • Be sure to switch out the customKey variable for your Global Address Complete license key. You can sign up for a free trial here!
  • In the options field, we specify the “isTrial” option with the boolean value of true. If you are using a production key, you can omit this option or set it to false to call our production endpoint.
  • We are using minimal options in our setup call to the service. This would be a great time to look at all the options the service has to offer and customize the call to your particular use case! Please reach out to get more information or recommendations based on your use case.

Your finished bit of HTML code should look something like the following.

Select Save.

4: Demoing the response from the Global Address Complete service.

Now we are ready to test the service. To do so, click “Preview Draft” in the upper right-hand corner. This should take you to a blank form with the address inputs we have previously set up. Start typing into the Billing Address field to see some predictions from the service.

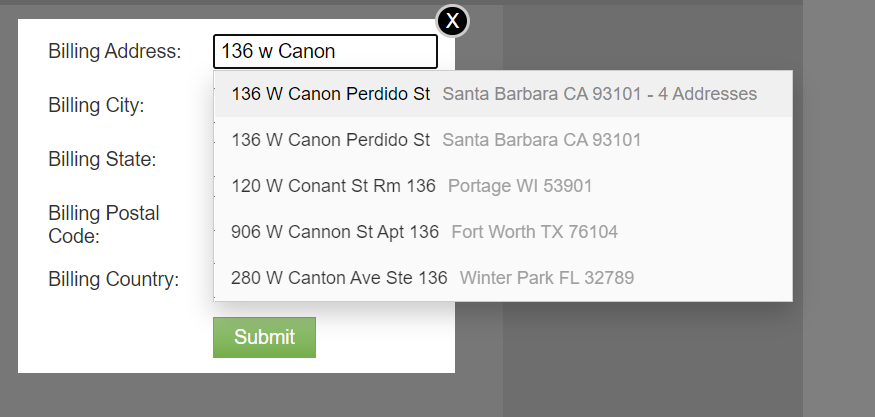
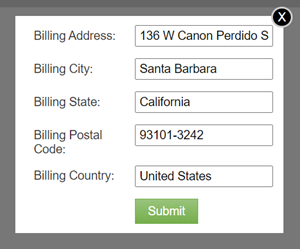
Selecting and clicking an address will fill in the other address components like so:

Troubleshooting Tips and Tricks

  • Make sure you place the setup call to the Global Address Complete service within the loadForm function; this will ensure you call the service after the form is setup.
  • If you are using custom fields, make sure you are using the right input ID’s in the setup call to the Global Address Complete service.
  • If you have any questions or want suggestions on how to make use of the service, feel free to email support@serviceobjects.com and we would be happy to help you get the most of your Service Objects Subscription.

Closing

Marketo is a powerful marketing tool. When paired with an address autocomplete service like, Global Address Complete, you can ensure data is captured quickly and accurately, helping you make the most of Marketo.

Get your free trial key today and start using it to reach your leads in Marketo!

LAST MODIFIED DATE

About Service Objects

Founded in 2001, Service Objects is the leading provider of contact validation solutions, validating online transactions in real-time, including contact name, address, phone, email, and device. Using Service Objects’ global validation and location web services, businesses can identify potentially fraudulent contact records, append additional contact information, and process transactions in a more efficient manner. Service Objects has validated nearly 5 billion contacts, and major brands such as American Express, Microsoft, and Amazon rely on Service Objects for their data validation needs.

For more information about Service Objects’ real-time web services, contact sales@serviceobjects.com or visit us online at serviceobjects.com.

Tel. (805) 963-1700
Toll. (800) 694-6269
serviceobjects.com
136 West Canon Perdido St, Ste D
Santa Barbara, CA 93101-8207