- Products
- Solutions
- Developers
- Support
- About

A big part of creating a custom module is getting the folder structure right. For our custom module, we’ll start by creating the following file structure:
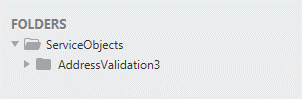
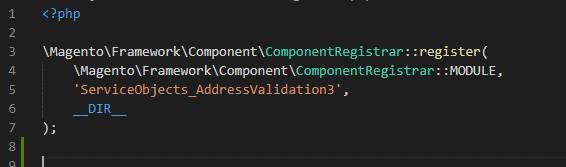
In this case, the text “ServiceObjects” is our Vendor name folder and “AddressValidation3” is the name of our custom module. Next, we’ll create a registration.php file in the AddressValidation3 folder. This file tells the Magento instance that we want to register a custom module. We fill the registration.php file with the following contents:
Next, we’ll create a folder called “etc” under the AddressValidation3 folder. Within this folder, we are going to create two xml files, di.xml and module.xml. The di.xml file will tell Magento which dependencies will need to be injected by the object manager. In our case, this will be the ShippingInformationManagement class that is used by the default Magento_Checkout module. This will also tell Magento to call our custom php file to extend the ShippingInformationManagement class. Note in the xml below, we list the ValidateShippingAddress.php file which we will create in a moment. We will add the following di.xml file:

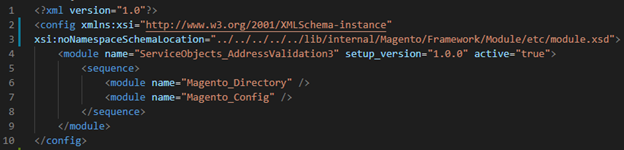
The module.xml file will tell Magento what version of the custom module is being installed, along with the module name, and any dependencies that the module may need.
We’ll also need to create a routes.xml file for the custom controller in the later part of this tutorial. To do this, create a folder named “frontend” under the etc folder and create a file called routes.xml within it. You can put the following contents in it:

Now that the proper xml files are defined, we can create the ValidateShippingAddress.php file and the associated method that will be called when a user attempts to save a shipping address.
To start, we will create a folder called “Plugin” under the AddressValidation3 folder where the ValidateShippingAddress.php will be placed. Within the created php file we will create a method called beforeSaveAddressInformation. For this case, we are calling out the method before the saveAddressInformation method gets called in the default Magento Checkout method. The signature of the beforeSaveAddressInformation method must match the original saveAddressInformation. Our method signature will be as follows:

The $addressInformation object will ultimately hold the values that we want to validate, and we’ll need to access those to send them to the Address Validation – US service. To do this, we’ll pull out the shipping address information from this object and send them to the Address Validation – US service using our php class library.

The class libraries are used to call our services using recommended best practices. This includes failover configuration to ensure maximum uptime in the event that the primary Service Objects data center is not reachable or is producing unexpected results.
Now that the code has called the Address Validation – US web service, we can set the updated values and return the result to continue normal operation of the default Checkout Module.
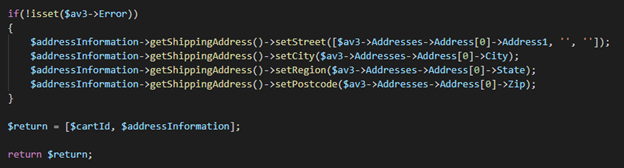
Note: In the code mentioned above, we simply check if the Address Validation – US service returned an error. If it did return an error, we will skip updating the address, as there would be nothing to update. This would be a great place to put in some custom business logic that applies to your specific application. For example, if you want to make use of the different DPV values our service returns, you could relay to the front-end user that an address was missing a valid apartment number (if the service returned a DPV 3 or 4). In this case, we are just updating the shipping address, but we could just as easily update the billing address with the following code if desired:

Now that we have returned the updated data in our plugin, the validated shipping information will be saved in the database.
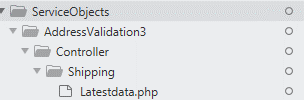
Now we can move onto putting in a custom controller that will allow our updated address information to be sent to the front-end, so the updated shipping address is displayed on the final checkout page. To do this we will create a folder called “Controller” in the AddressValidation3 folder, and within the Controller folder, we’ll create another folder called “Shipping”. Under the Shipping folder, we will create a file called Latestdata.php that will be an endpoint called by the front-end to return the updated address information from the database. The folder structure should be as follows:
Within the Lastestdata.php file, we can put the following code that returns a JSON object with the updated address information for the front-end.

This code looks up the updated address information by the active $cardId field and returns the updated shipping address.
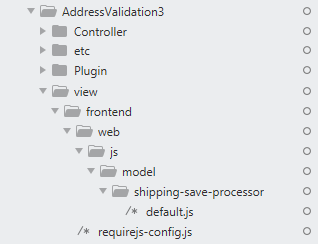
For the code to be called, we’ll need to add a call to the controller on the front-end by overriding some of the JavaScript that handles the rendering of the address. To do this we will need to create some more folders and subfolders under the AddressValidation3 folder. Your folder structure should look like the following:
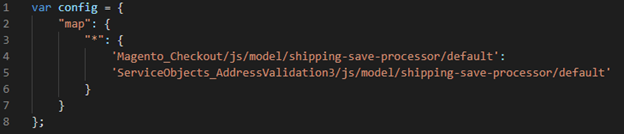
The requires-config.js file is under the front-end folder and tells Magento what default .js file that we want to overwrite. In this case, it is the default.js file under the shipping-save-processor folder. The requires-config.js file should contain the following contents for our tutorial:
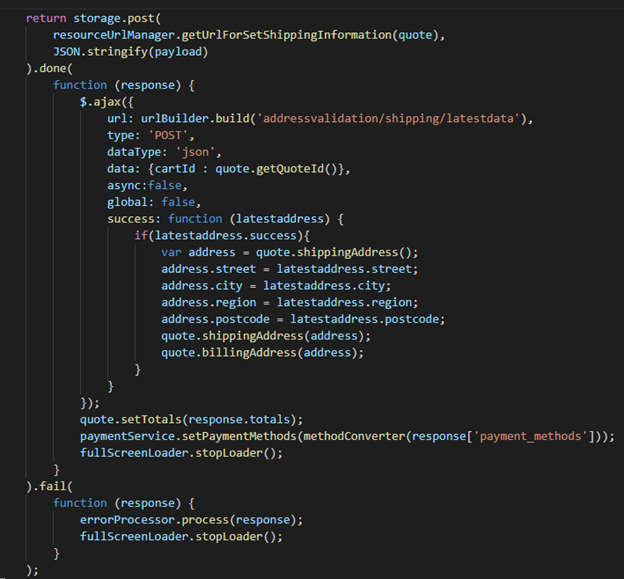
In the updated default.js file we have in our project, we’ll add the following bit of code that will call the custom controller we just created and set the shipping address on the output.
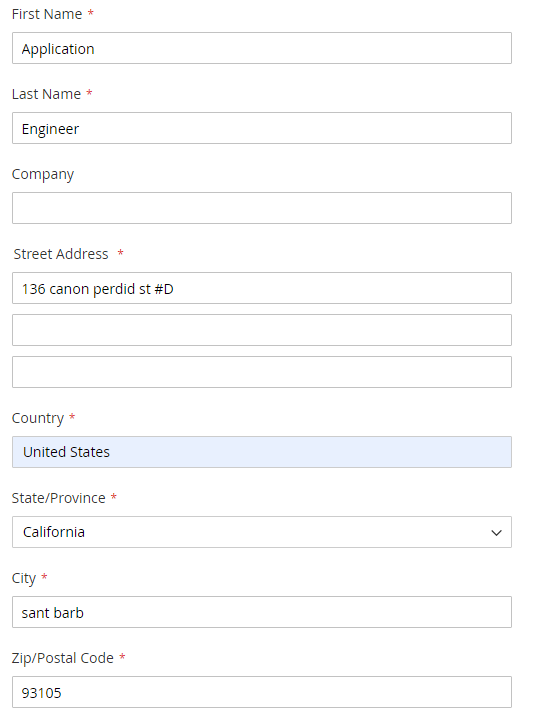
Now that we have everything in place, we’re ready to install the custom module and show off the results! To install the custom module, place the custom module in the app/code/ directory of your Magento instance and run the “bin/magento setup:upgrade” command to have Magento install it. If everything goes smoothly, your module is ready to test out! To do this, we’ll just do a quick order of one of the default products that come with the sample data installation of Magento. On the shipping address screen, we’ll enter Service Object’s office address that will include some errors and unstandardized versions of the address.
After we select Next and go to the next screen, we will see that the input address we had has been corrected and standardized in the checkout screen. Notice the correction to the city, zip code and street name correction.
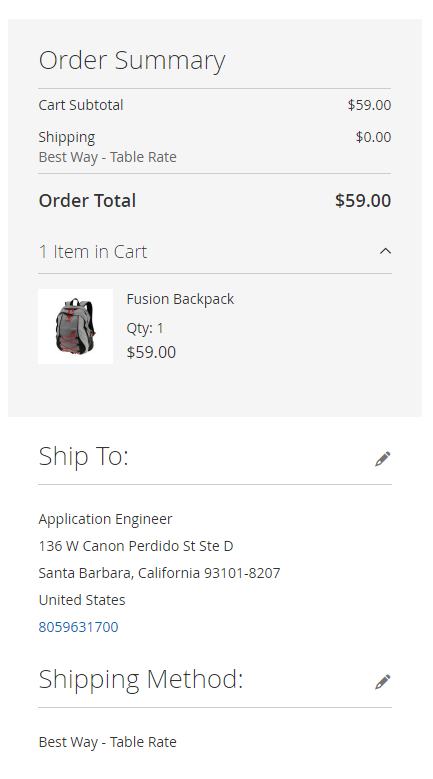
Voilà! Now we have some validated address info on the output and our custom Magento module is finished! As mentioned earlier in the tutorial, it can be downloaded here. Your specific integration will likely be different and may require some special consideration; please reach out to us if you have any questions and we’ll be happy to make recommendations for your specific integration needs!


