Python is a versatile, robust scripting language that can be used for a variety of projects and implementations. One thing that separates Python from other programming languages is its use of white space and indentations to separate different blocks of code rather than curly braces that languages like Java or C# use. This can often be a polarizing issue for many developers but it is simple enough to start using once you have some experience in it. For this tutorial, we’re going to look into making a RESTful web service call to our DOTS Phone Exchange 2 service to validate an international phone number. You will need the following to participate in this tutorial.
What you’ll need
- Python Installed on your Test Machine(2.7.11 is used in this version)
- IDE or Text editor of choice. We’re using the community edition of PyCharm.
- A DOTS product License key of choice. We’re DOTS Phone Exchange 2 for this example.
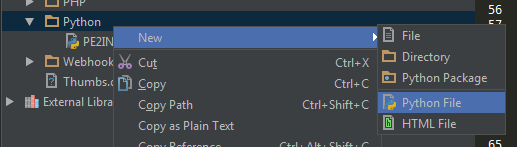
Once you have all the necessary prerequisites installed, Launch PyCharm and create a new project in your directory of choice. Once you have a project created right click on the project location in the solution and select “New” and then “Python File.”
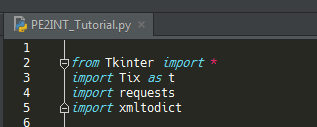
For this project, we will use the following modules that we are importing at the top of the .py file. The “Tkinter” module will allow us to have a simple GUI to allow the user to enter phone number Information to be validated. The “Tix” module allows us to use some handy labels, scrollbars and buttons to properly display the outputs from the service, and the “requests” and “xmltodict” modules will allow us to make a HTTP Get call and parse the results in the Python dictionary respectively.
To add these modules in PyCharm you will need to go into settings from the File menu. Select Project:, and then select Project Interpreter. Click the small green plus symbol in the upper right-hand corner and from there you can search for and install the necessary modules to run this project.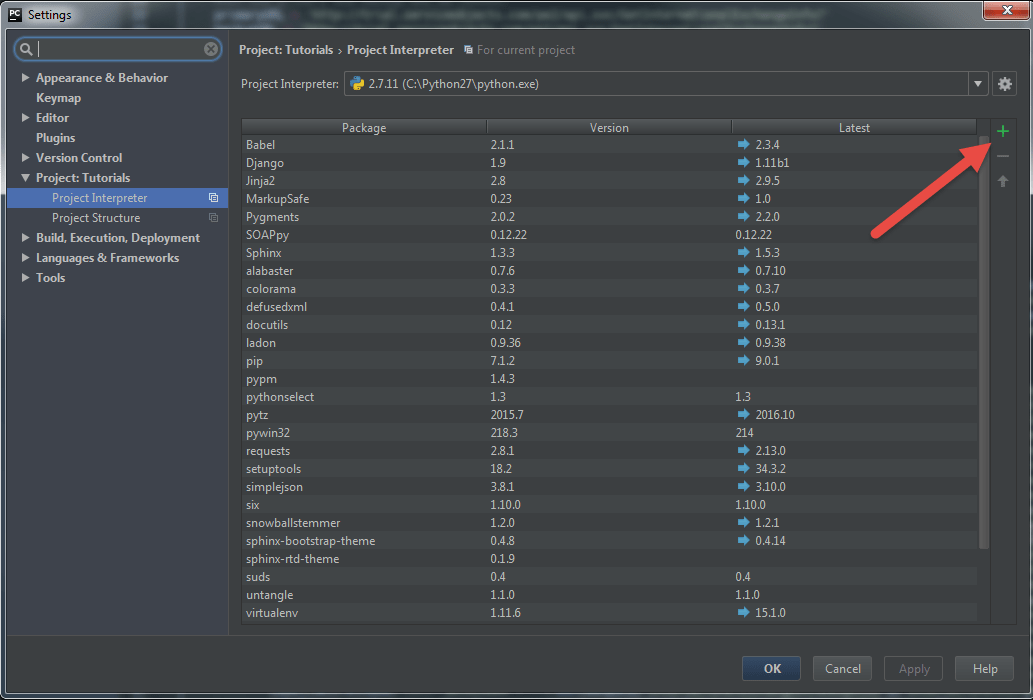
Now that we have all the necessary modules in place, let’s create a method that will eventually make the HTTP Get call. For now we will leave it empty as shown below.

There is nothing very exciting happening in that method at the moment, but we’re certainly going to change that. We’ll now create the elements necessary to take in the values that will create a successful call to the GetInternationalExchangeInfo operation for the DOTS Phone Exchange 2 web service. The service takes in 3 values as an input: PhoneNumber, Country and Licensekey. To create the necessary input elements, add the following bits of code to your python file below the method definition.
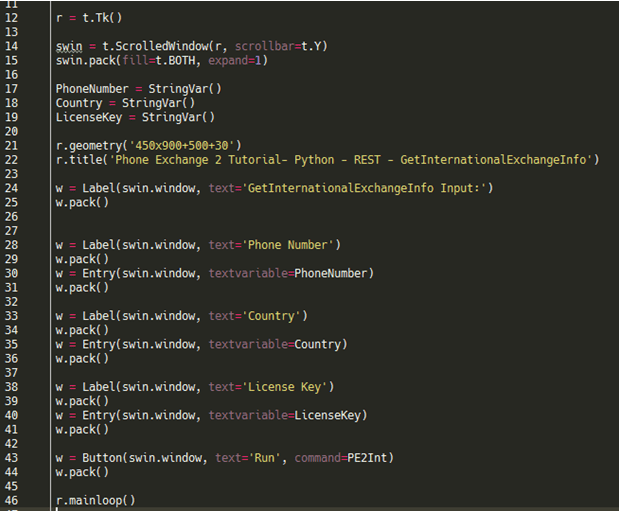
This will give our GUI a title, and 3 text boxes so that we can enter the necessary information to validate an international phone number. Notice at the bottom that once the button gets pressed, it will call the PE2Int method which we have defined right above this code. Since we have the user interface all setup, we can go ahead and enter the code that will make the actual call to the web service and then display the results to the user.
Web service call and failover configuration
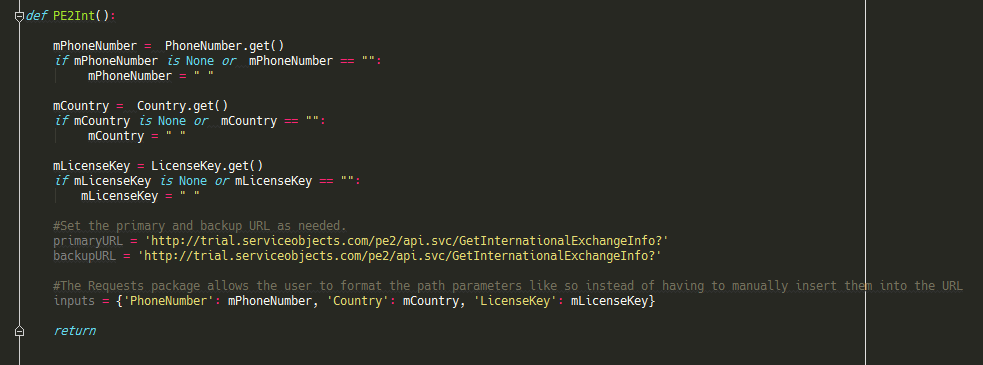
For starters, we’ll take inputs that a user will enter in the text boxes in the GUI and also instantiate the beginning part of the URL that we’ll be using to make a web service call. Additionally, we’ll utilize a feature of the “requests” module that allows the user to format the query string items in the URL in a more readable way. See below for the example. Our new code will also have a “primaryURL” and “backupURL” string which we’ll talk about more when we get to implementing proper failover into the project. Add the following code to the program under the primary method.
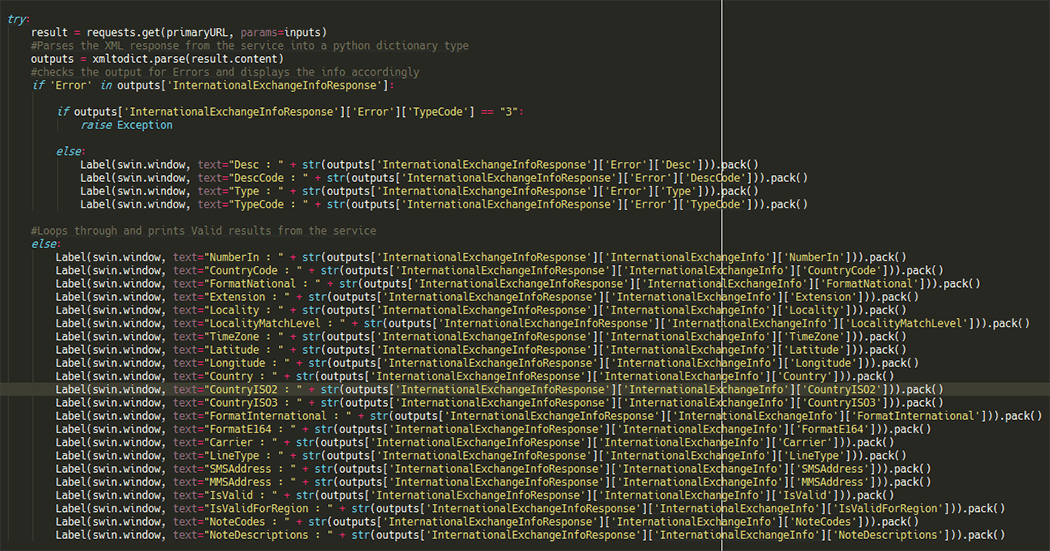
The project will now implement a few try/catch blocks that will call the DOTS Phone Exchange 2 web service and handle any potential errors that come up during the call to the web service. In this basic bit of code, we show how to call the service using the “requests” module and how to properly failover to another data center in the event that the primary Service Objects data center is not responding as intended.
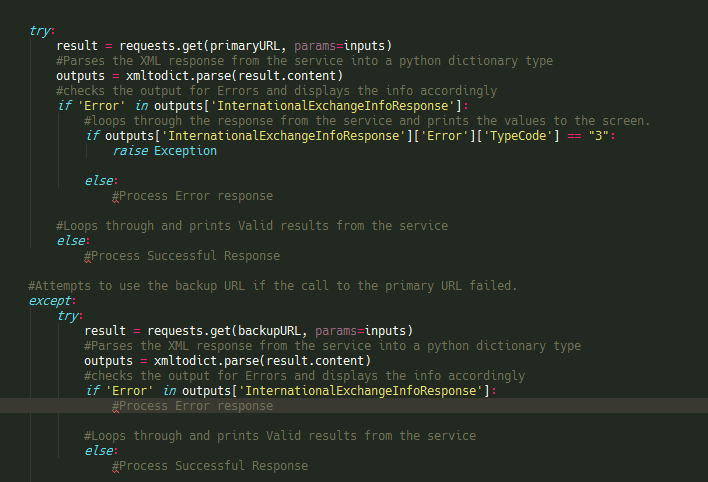
As shown above, the code will call the primaryURL and then process the response depending on the results returned from the service. If an error code is returned and a TypeCode of “3” is returned the code will throw an exception, and then call the backupURL to receive a valid response from the service. A TypeCode of “3” indicates that something has gone wrong with the service and that it is throwing an “Unhandled Error.”
![]()
Proper error checking and failover implementation should be used to ensure that your business logic goes uninterrupted and can continue to be used in the event that the primary Service Objects data center is offline or not behaving as expected.
Displaying the results to the user
Now that our failover configuration is properly set up, we can work on displaying the results to the user. To do this we’ll create Label’s using the Tix module that will simply allow us to show the values that are returned from the service. To do this, make statements in the primary call and back up call section of the code resembling the following.
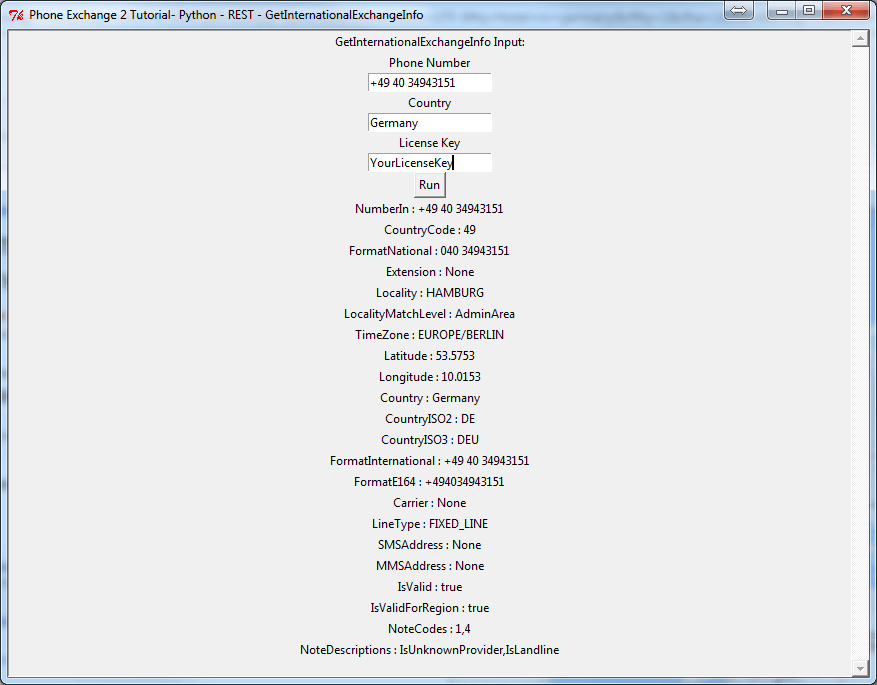
Now it’s time for testing! For this example, we’re using the phone number to a Hotel in Germany, but feel free to test any phone number you would like! This operation will also validate phone numbers from the US and Canada as well. Here is an example of the sample output from the service.
This concludes our python tutorial. Please contact support with any questions or tutorial requests!