A few weeks ago we published a blog article titled “Why You Should Never Put Sensitive Data in Your JavaScript” and it described some of the dangers that accompany client-side scripts like javascript. More specifically, if you are using an API like a Service Objects web service, the license key that is passed to the web service can be plainly visible to anyone who can inspect the page source. Obviously, if you are looking to keep your page secure, this is bad. Luckily enough, there are solutions available for you if you are keen on using javascript.
One such solution for this would be to use NodeJs. NodeJS is a versatile server-side platform that can be used for networking or server-side applications. This short step by step tutorial will give you the bare bones server to begin testing a Service Objects web service using Node JS.
What you will need:
-NodeJS installed on your machine
-Your favorite Text Editor
-Familiarity with the Command Line
-A license key to the DOTS Address Validation 3 web service. Get a free trial key here!
Creating the Server
Once you have NodeJS and all your environment variables set correctly, you will have to navigate to the directory on the command line where your node.js file will be.
For this example create a file called GetBestMatches.js with your text editor and enter the following code in the file:
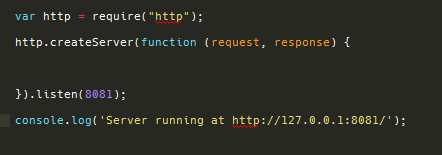
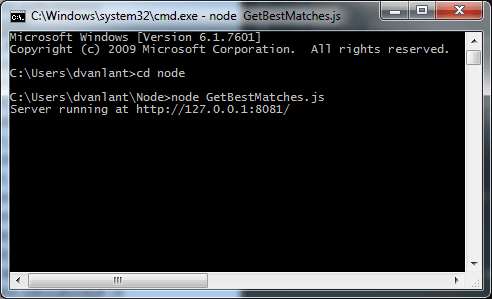
This small bit of code will create our server and run it on port 8081. When the server is launched through the command line using the command “node GetBestMatches.js” we’ll see a message in the command line that the server is running:
Seems simple enough right? Now, let’s add some more code that will allow us to display some information to the client side. Inside the http.createServer function, add the following code:
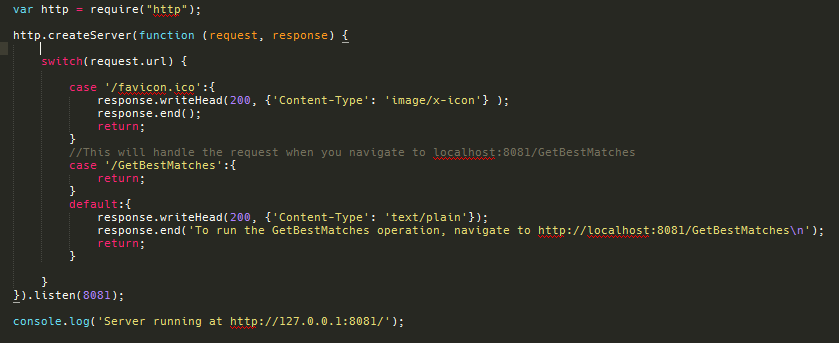
Here we have a switch statement that contains 3 different cases that will set up the response header on the client side, have our URL that will eventually call the web service and display some default information on the localhost URL shown above. When this bit of code is launched the URL above will show the following:
 If we do navigate to the GetBestMatches link, well, nothing will happen. But we’re going to add some more code to change that.
Setting the Inputs and URLs
Here we will add code to instantiate the input values and the URL necessary to successfully call DOTS Address Validation 3. This process will be relatively similar to the necessary process to connect to most of the DOTS validation products, but you will need the specified input for that service and the respective license key for the service.
Here’s what the code will look like:
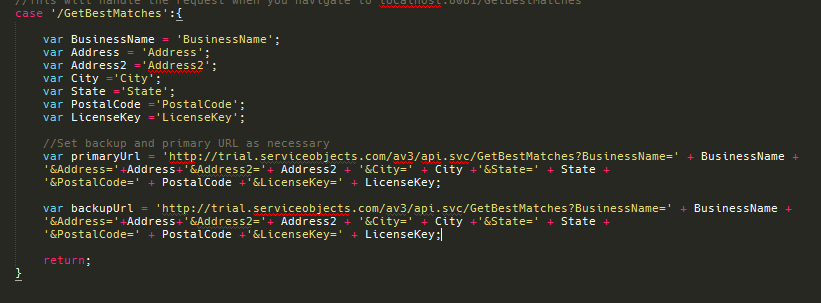
As shown above, the values for our inputs are hardcoded here just to simple test how to interact with the Service Objects API within Nodejs. When using this in production, you will obviously want to dynamically pass in the values to be validated, but for this tutorial, we’ll use the hardcoded inputs just for example and testing purposes. In the screenshot above there is also a primary and backup URL that we create. Currently, both of the URLs point to the same environment; but if the service is being used in a production environment, the primary URL should point to sws.serviceobjects.com and the backup URL should be pointed to swsbackup.serviceobjects.com.
Setting up the Call to the Web Service
Now that our inputs are created, we’ll add the code that will actually perform the GET call to the service. to do this, we’ll use the http.get function of the server that we’ve created and parse the results from the service in a readable format:
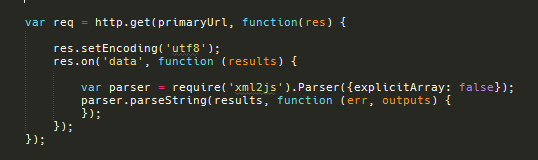
In this set of code we set the encoding and set the response from the service equal to the results object. We also have included the xml2js package to parse the XML that comes back from the service. This will simply allow us to display the results from the service in a more readable way.
Implementing FailOver Configuration
For the last bit of code that we’ll add, we will include proper failover configuration so that in the event that there is a service outage or that the web service is not responding correctly, your code and calls the Service Objects API will continue to function normally.
In the code below, if an error code Type 3 is found from the web service, then the code will use the backup URL. If a successful response is received from the service then the code will display the results on the client side:

This is all the code that we will need to make a successful call to the DOTS Address Validation 3 service. We’ll change the inputs to use the Service Objects address (27 E Cota St STE 500, Santa Barbara, CA 93101) to show an example response from the service. If the server is restarted, you will see the output that is displayed to the user:
“IsCASS”: “true”
}
That completes our tutorial for JodeJS. If you have any questions, feel free to reach out to our tech team anytime!