Ruby on Rails (or more colloquially, “Rails”) is a server-side web application framework that provides its users a powerful arsenal to create web pages, web services and database structures. Rails utilizes a model-view-controller (or MVC for short) framework that provides an easy way to separate the user interface, database model and controller.
One of Service Objects highest priorities is getting our clients up and running with our DOTS Validation web service(s) as quickly as possible. One way we do this is by providing sample code and occasionally, step by step instructions. So if you are partial to using Rails, this tutorial will provide everything needed to get up and running.
What you will need
- A DOTS license key, click here for a free trial key. We’re using DOTS Email Validation 3 for this tutorial.
- Your Favorite Text Editor (Sublime, Notepad++ etc)
- Ruby On Rails installed on your test machine.
- Familiarity with the Command Line
Creating a default project
First, navigate to the directory via command line in which you would like the project created. Once the command line is in the desired directory, run the command “rails new EV3Tutorial.” You may call the project whatever you prefer, but this will be the name of our tutorial.
After the project creation is finished you should have a brand new Ruby on Rails project. You can launch the server by simply being in the project directory and entering “rails server” into the command line. The default port number the project runs on is 3000. We’ll be using port 3001 for this project; the port number can be specified by entering the following command to launch the server: “rails server –p 3001”.
If you run the server and navigate to the applicable localhost URL where it has been launched, you’ll see the following page:
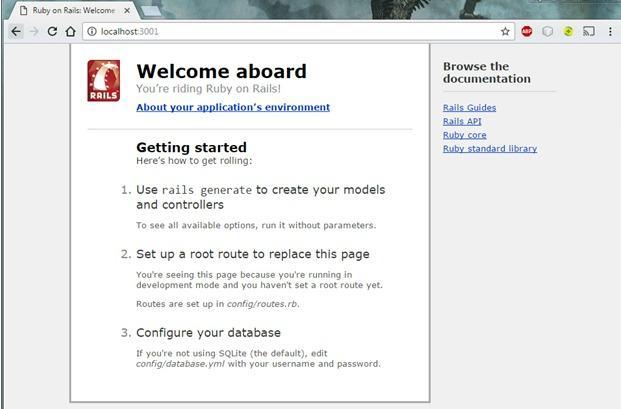
This page is the default page for any new Rails project. From here, you find more documentation about working with Rails.
Generating a model and controller
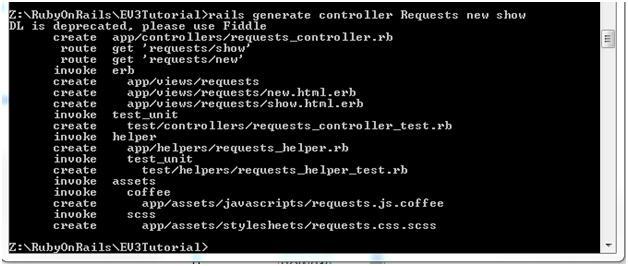
We’ll need a controller to make the actual call to the DOTS web service and a model to pass information to our controller. Simply type “rails generate controller request new show” and the necessary controller and views will be created. This command will also create two new views; one titled “new.html.erb” and the other called “show.html.erb”. The command line should look similar to the following.
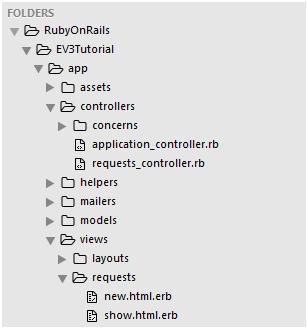
After this command is run, the controller folder and the views folder will have some new files created. It should look like the following:
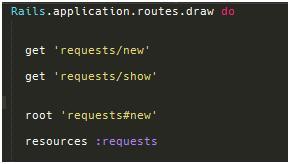
The “new.html.erb” file will be our default page, so to make the application load it automatically open the routes.rb file in the config folder of the project and make the routes page look like the following.
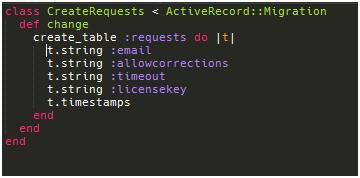
For this example, we’re using the “ValidateEmailAddress” operation which has 4 separate inputs. EmailAddress, AllowCorrections, Timeout, and LicenseKey. These, in turn, will be part of our model that will pass values from the view to the controller. So before we fill in the HTML page, we’ll create the model and include these values in its definition.
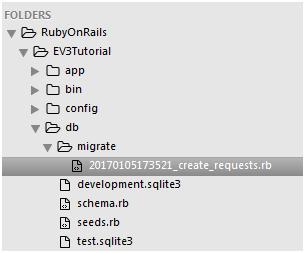
Enter the command “rails generate model request” in the command line. The values in the model can be specified via the command line, but it is usually easier to enter it in the model file. Locate the model schema in the following folder:
To add values to the model, make the model schema on your file look like the following.
In order to use the model, it will need to be migrated. To do this enter “rake db:migrate” into the command line to commit the model.
Creating the views
Now that our model has been created and committed to the database, we can pass values from the view to controller. To do this, we’re going to create a simple web form with the inputs to send to the DOTS Email Validation service. To do this, add the following code to the “new.html.erb” file.

Now that our input page is set, we’ll make sure our “show.html.erb” file is ready to display some output values from the service. We will include a brief if statement in the show that will determine whether or not an error object is present in the response from the service. If one is present we’ll display that if not, we’ll display the valid results. Make your show.html.erb file look like the following.
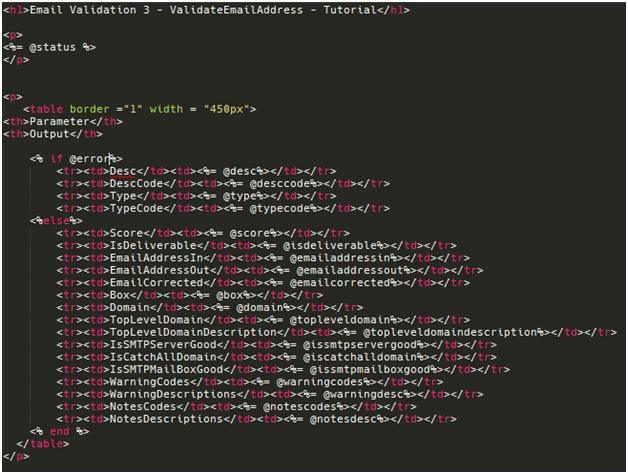
These output fields haven’t been instantiated or set to any values yet but that will happen in our controller.
Integrating logic into the controller
Now that our views are set up, we’ll need to put some code in the controller to make the actual web service call to the Service Objects web service. To make this call, we’re going to use the gem “httparty” which will allow us to make a RESTful web service call. Be sure to place this gem in your projects gem folder and run a “bundle install” in the command line.
We won’t go over all the elements of the controller file in this tutorial, but rather just touch on some important parts of the logic to be integrated. The screenshot below highlights some important aspects of calling the web service.
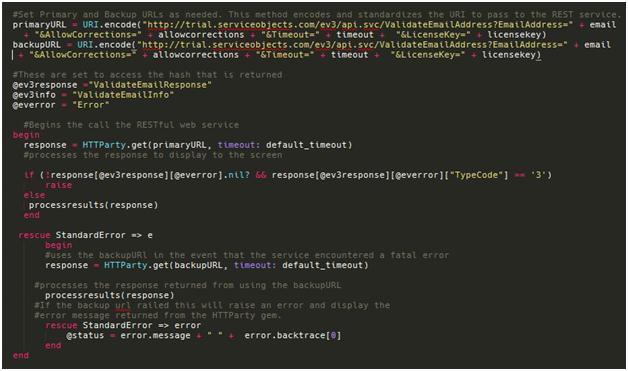
The code above has a primary and backup URL. Currently, they both point to the Service Objects trial environment. In the event that a production key is purchased, the primary URL should be set to sws.serviceobjects.com and the backup URL should be set to swsbackup.serviceobjects.com. These two URLs along with the accompanying logic that checks for a fatal error (TypeCode 3 for DOTS EV3) will ensure that your application continues to run in the event that the primary Service Objects data center is offline or experiencing issues. If you have any questions about the failover logic, please don’t hesitate to contact Service Objects and we will be glad to assist further.
The code above calls an internal function, “processresults,” to display the values to the user. Here is the accompanying screenshot illustrating some of the logic of this function.
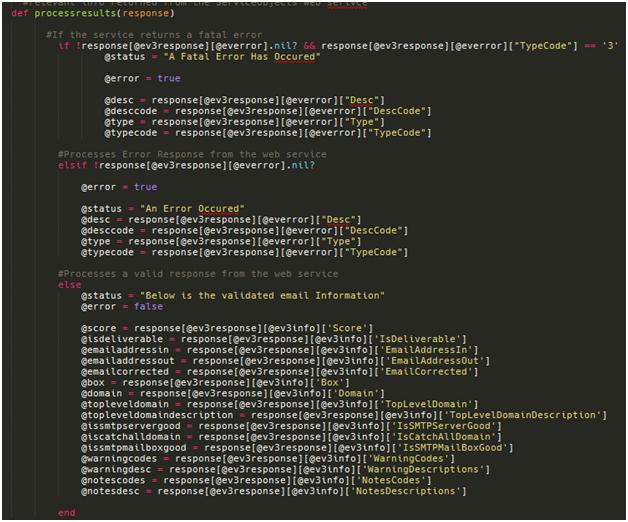
Depending on what response comes back from the service, this code will display the values to the user. For your application, you will likely want to create a class that will automatically serialize the response from the service into something a bit easier to use; but we are showing the above logic as an example of how to parse the values from the service. Note: the @ev3response, @ev3info and @everror are present to help parse the response hash that httparty automatically creates for the response.
Final Steps and Testing
Our project is ready to test out. For this example, we’ll use the email support@serviceobjects.com to get a valid response from the service.

Entering these values in to the text boxes, along with a valid license key, should result in the following output.

That completes our Ruby on Rails tutorial. If you have any questions about this, any other tutorials or sample code please don’t hesitate to contact us! We would love to help you get up and running with a Service Objects web service(s).