Introduction
Integrating our DOTS Global Address Complete solution can now be completed by anyone familiar with HTML and JavaScript. We make the integration process easy so that almost anyone will be able to get it up and running in little time.
Our solution is designed for web-based technologies that can consume our JavaScript helper file. We have simplified the integration process down to three easy steps: JavaScript and CSS files, field mapping and customization by setting options. This integration guide will take you through a typical HTML web form integration.
Step 1 – JavaScript and CSS Files
The first thing to be done on the page you want to integrate with Global Address Complete is to make a reference to a couple of JavaScript and CSS files. The JavaScript file will handle the address suggestion functionality, and the CSS file will help with the formatting of the field. The CSS file is just as critical as the JavaScript file for integrating this solution.
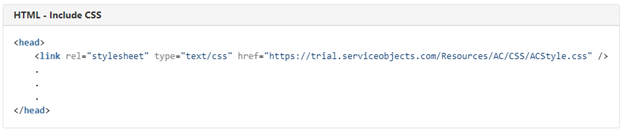
Starting with the CSS file ACStyle.css, add it to the page using the link tag in the head section.
For the JavaScript file ACScriptV1.01.js, add it using the script tag at the top (inside the body).

Step 2 – Map Fields
Step 2 involves mapping the fields on the form to the fields in the JavaScript file that we added in the previous step. In this example, we will be adding the mapping inside the script tag on the same HTML page. However, you are free to create a separate JavaScript file and add the mapping code there. If you do add it to a new JavaScript page, be sure to reference it in the HTML page the same way we did in step 1 when we referenced the ACScriptV1.01.js page.
Here is an example of an HTML section with the input fields on a typical web form. Make note of the ID values on the input tags, because these will be used in the mapping part of the script tag.
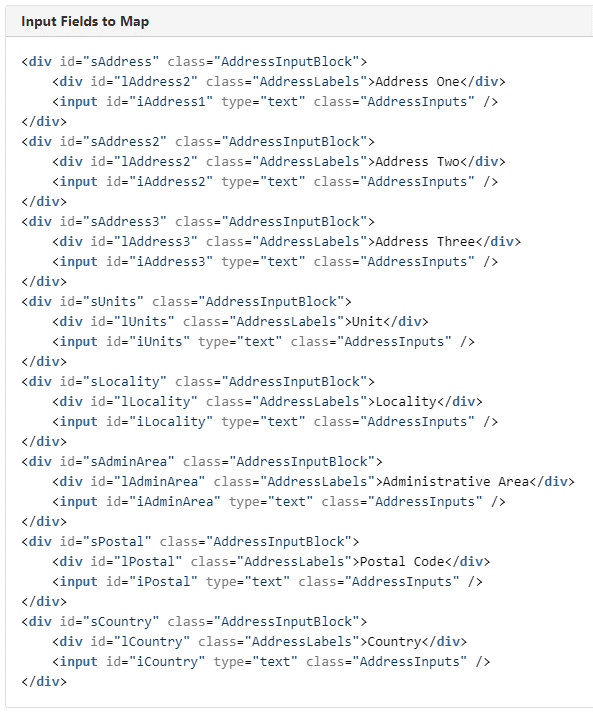
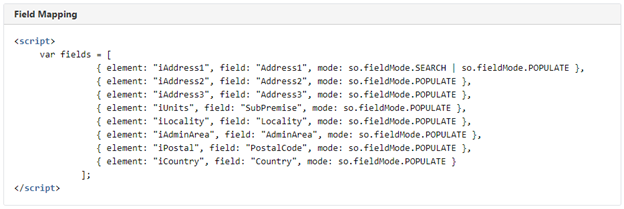
Now that we have made note of the iAddress1, iAddress2, iAddress3, iUnits, iLocality, iAdminArea, iPostal and iCountry ID fields that we are ready to map, add the code shown below in the script tag. Here we are mapping the iAddress1 input field to the searching mechanism in the referenced JavaScript. This is where the address suggestions will be displayed. All of the other fields are set to POPULATE, so upon selection of an address, those fields will be filled with the result automatically.
Step 3 – Set Options
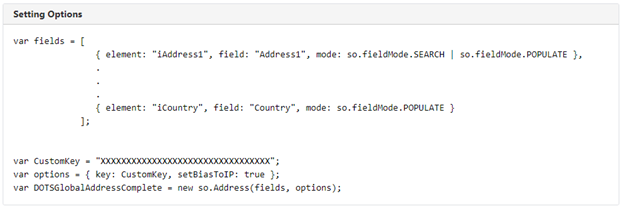
This final step is where you can customize how Global Address Complete works for your solution. Here we will continue where we left off in the last step and add the next lines of code after the ending bracket of the fields assignment (but still inside the script tag).
To complete the setup, you will need to have a Custom Key and will need to know if you are using a trial key or a live key. We will pass the Custom Key to the options variable, and if we are using a trial key no additional options need to be set. If you were setting this up for a live implementation, adding isTrial: false would be needed in the options variable, so the entire version of what we have below would look like this: var options = { key: CustomKey, isTrial: false, setBiasToIP: true };.
No other settings need to be made, however, in this example we added setBiasToIP and set it to be true. This means that the service is going to be looking for addresses to suggest, starting from your IP address location.
Once you have the options set, your form will now be activated to suggest addresses as you type, and your implementation is complete.