Running a Smart Campaign in Marketo can help improve your business’s engagement by promoting events or products to new or existing customers. To ensure your Smart Campaign in Marketo is sending to accurate email addresses, our DOTS Email Validation service can be easily integrated to verify that every email address is valid and correct helping to improve deliverability and bounce rates in your Smart Campaign. In this step-by-step guide, we will explain how to create a smart campaign in Marketo that calls a Service Objects webhook.
A. Mapping webhook responses
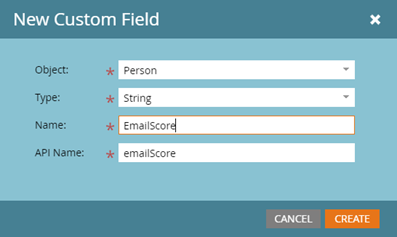
- First, create custom data fields to map the service responses to your database. To do this, go to Admin>Database Management>Field Management, and click on “New Custom Field”. From there, you will make fields for each of the response components for the service you are using. You will choose the type of object this field will affect, the data type, the custom field name, while the API name is how you will refer to it in the field mapping.
- Next, map the webhook responses to these custom fields using the XML or JSON schema syntax. For example, the Email Validation 3 response in XML format would look something like this:
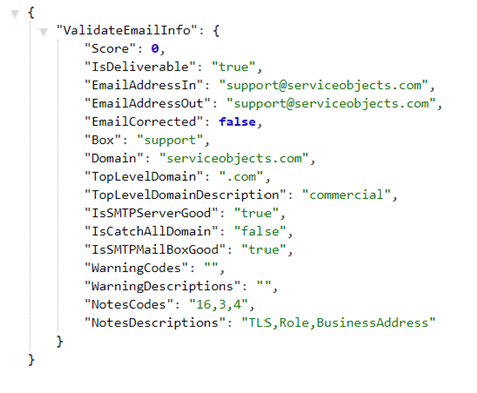
- To map the “Score” response to the custom field you just created, you would refer to it as ValidateEmailInfo.Score. To get to the webhook mappings, go to Admin>Webhooks, and select the webhook you are using. Then under “Response Mappings”, click Edit, then Add, and type ValidateEmailInfo.Score in the “Response Attribute” column, and the API name for the custom field you created in the “Marketo Field” column.

B. Creating a Smart List for your campaign
- The Smart List is a list of whom you will target in your Smart Campaign. There are lots of filters and triggers that can be used to create the Smart List that makes sense for your business, but in this example, we will be focusing on the “Clicks Link in Email” trigger:
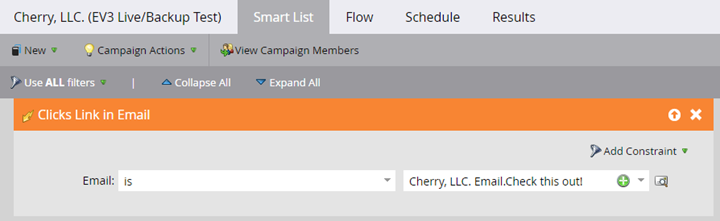
This will create a Smart List of all of the people who clicked on the link embedded in the email you choose. In this example, we have created a fictional company called Cherry, LLC. that sends out an email named “Check this out!”. Everyone who clicks the link in the email will get added to the Smart Campaign.
C. Creating a Flow for your Smart Campaign that calls a webhook
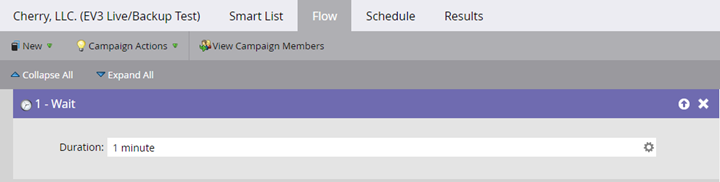
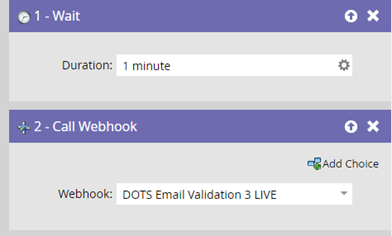
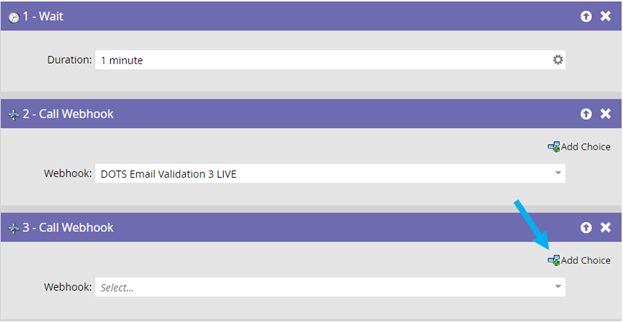
- The Flow of your Smart Campaign will probably be different for each campaign, and Marketo has a variety of options of actions to take in your Flow. In this example, we will start with a Wait step; after the member is added to the Smart List, we will wait 1 minute before performing other actions.
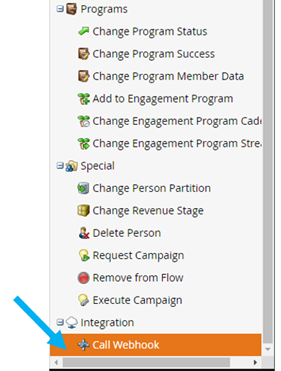
- Next, let’s call the webhook. Scroll down on the right to the Integration tab, drag the Webhook option over to the next step in your Flow, and choose the webhook you are using from the dropdown menu.
- Next, it is important to have a failover webhook in case the first one experiences an error. Your LIVE webhook will be at sws.serviceobjects.com, and the BACKUP will be at swsbackup.serviceobjects.com. In order to route to the backup in case of error, drag over another Webhook step into your flow, and click Add Choice:
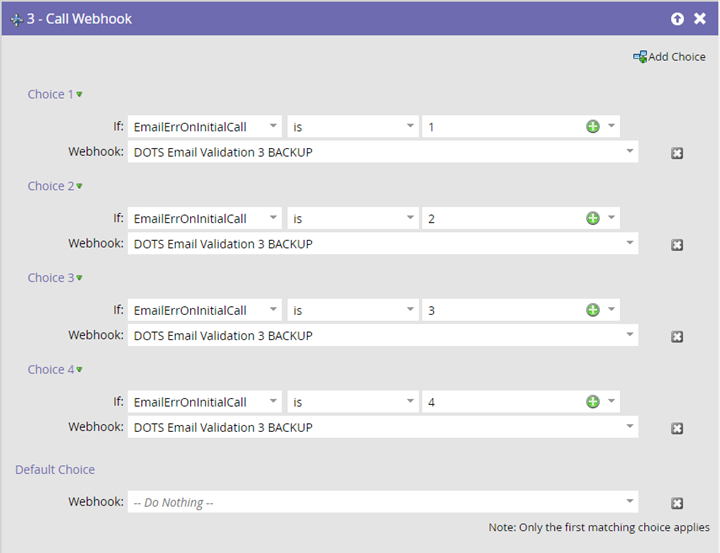
 *NOTE* For the next step to work, you need to create custom fields for each webhook’s error response. In this example, we are mapping Error.TypeCode to custom field EmailErrOnInitialCall for the LIVE webhook, and custom field EmailErrOnBackupCall for the BACKUP webhook.
 - In the choice menu, choose EmailErrOnInitialCall from the dropdown menu for the If: condition, keep “is” for the middle choice, and type in one of the possible error codes for the service in the third box. Here, one of the possible error codes is “1”. Then, select the BACKUP webhook from the Webhook dropdown menu. Repeat this process of adding choices for all the possible error codes for the service. Leave the Default Choice as is.
- Now you are ready to finish your campaign, as you see fit! Here, we send out an email that thanks the members of the campaign, however, the next Flow steps will be customized to your business logic.